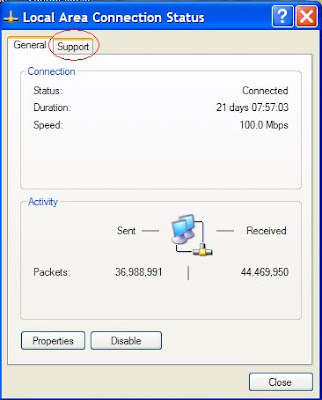
First open your Local Area Connection. Find for the 'Support' button and click it.
You will see the screen below.
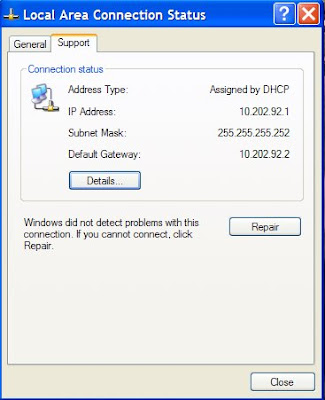 Copy down the three sets of numbers.
Lets call them 'Set A', 'Set B' and 'Set C' respectively.
Click on 'General' then click 'Properties' then you will see the screen below.
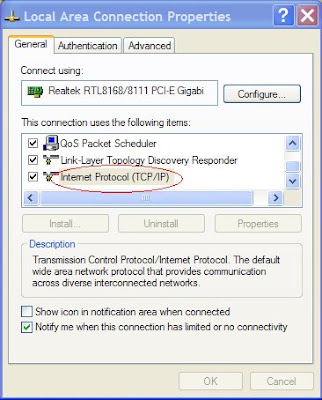
Look for Internet Protocol (TCP/IP) and click on 'Properties' once you have selected it.
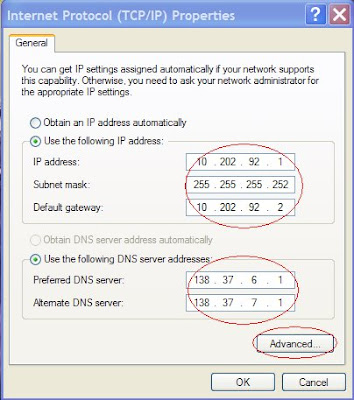 Click on 'Use the following IP address' and enter YOUR Set A, Set B and Set C respectively.
In the 'Use the following DNS server addresses' just enter exactly as I did.
Click on 'Advanced', you will see the screen below.
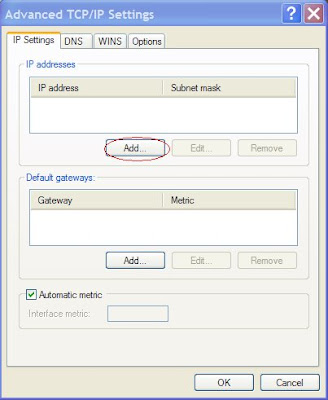 Click on the 'Add' button and enter under the IP address:
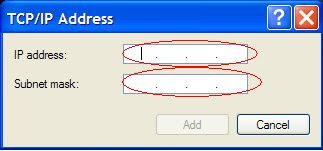
192.168.1.XXX , XXX refers to any number of your choice.
This XXX number can be used to share your files if you choose to.
It is sensible to use your room number, I live at F24 so my number is:
192.168.1.24
For the subnet mask, enter:
255.255.255.0
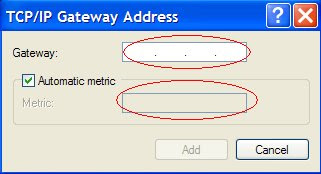
For the Gateway Address enter:
192.168.1.1
Just close everything, remember to save it instead of hitting cancel.
You're all set to view my Shared Files!
Click on 'Start' from desktop.
Click on 'Run'
Type '\\192.168.1.24' to access MY shared files.
or 192.168.1.XXX to access your friend's shared files.
192.168.1.1
Just close everything, remember to save it instead of hitting cancel.
You're all set to view my Shared Files!
Click on 'Start' from desktop.
Click on 'Run'
Type '\\192.168.1.24' to access MY shared files.
or 192.168.1.XXX to access your friend's shared files.

No comments:
Post a Comment